Configuration
- In order to use the 3CX softphone, the appropriate version is to be installed first - you will receive a welcome email from Solgari, complete with instructions and download links.
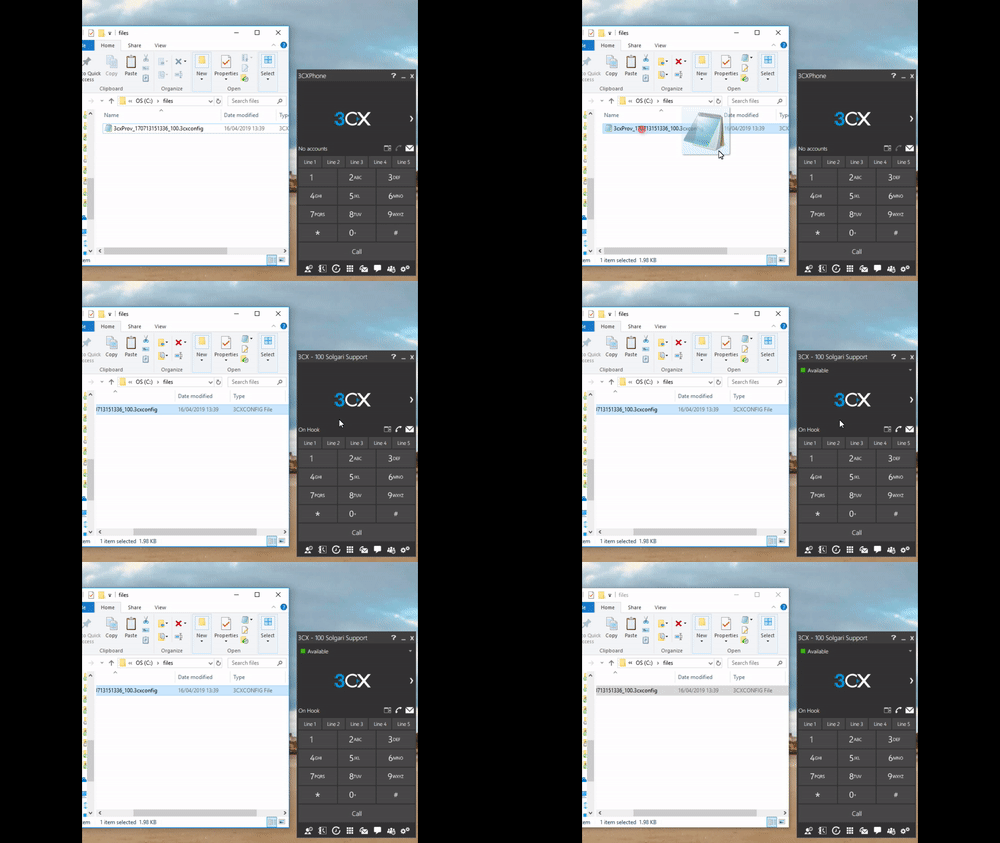
- Once 3CX softphone has been installed, the configuration file (attached in the welcome email) needs to be applied to the softphone. You can generally do this either by double-clicking the configuration file or saving the attachment first and then drag-and-drop it into the softphone

General Tips
- Using normal music headphones in conjunction with an internal laptop microphone may in some cases result in less than optimal call quality
- To ensure optimal call quality we would recommend using a good quality Telephone Headset
- Exit any other telephony applications that may be running (especially if you encounter problems with audio)
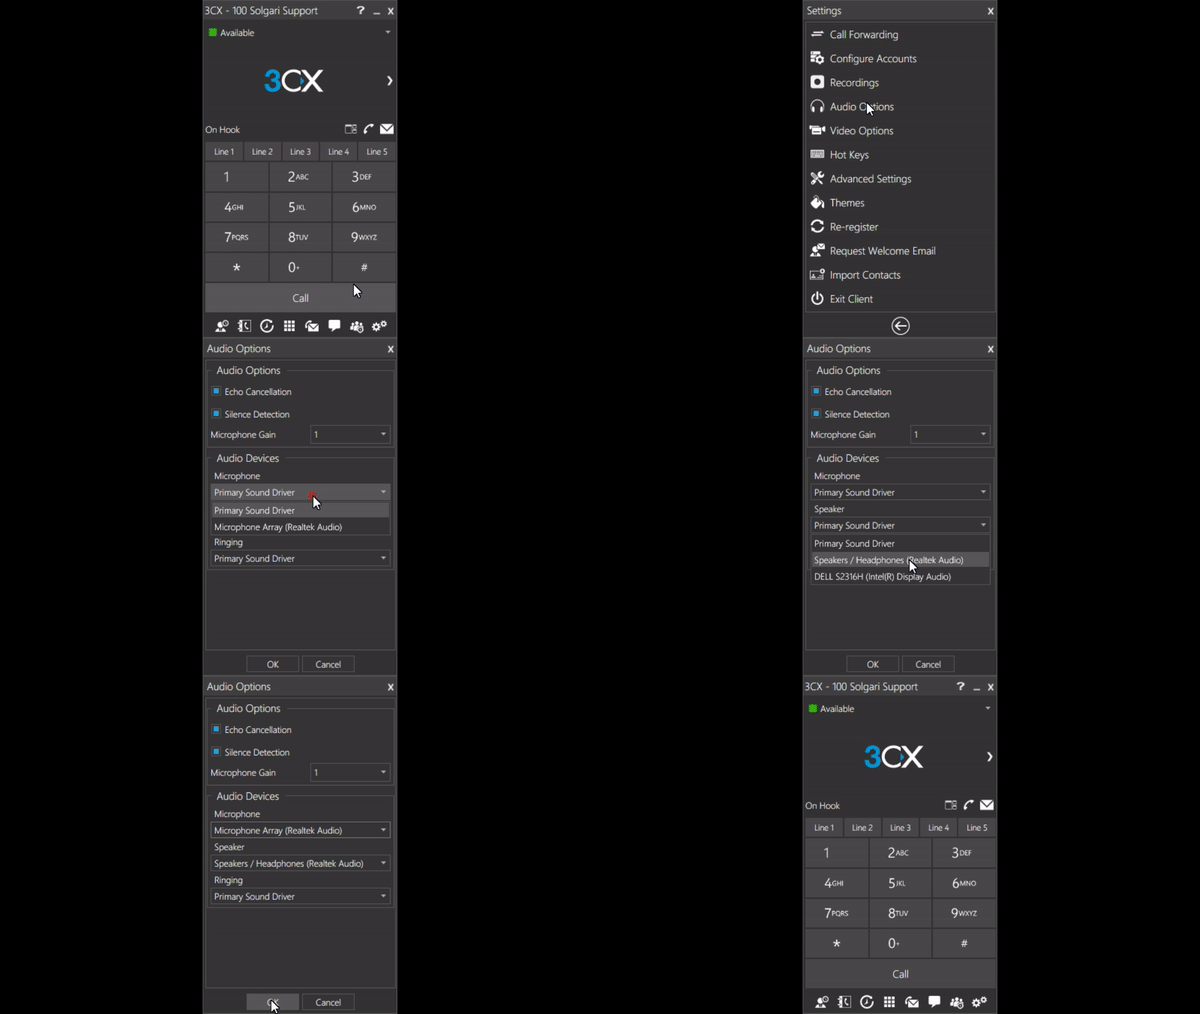
Tell the Softphone which Microphone and Speaker you will be using(Windows/MacOS)
- Click on
 then Audio Options
 - Under Audio Devices, select your microphone and speaker

Optimize Microphone Volume Setting(Windows)
By default the microphone volume in Windows can be often set to a volume level which is too high for high quality audio. Follow these steps to correct the volume level
- Right click on the
 icon and select Recording Devices
 - Ensure that your microphone is configured as the Default Device by clicking on the microphone to highlight it and then click Set Default
- Select your microphone and click Configure
- Click on Set up microphone and follow the instructions to optimise the volume level