You can add the Channel Communication Click-to-Dial Control based on your organization and business requirements.
The example steps below illustrate adding the Channel Communication Control for the Contact form of Main type under the Contact entity.
The same method can be applied to other forms to enable click-to-dial.
Note that if you cannot find the entity of changes are not reflected correctly you should make sure you're working on customizing the correct form. Double-check the upper left hand corner of a record you wish to customize (under the name of the record). Example screenshot here
|
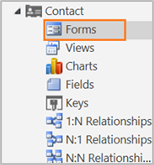
1. Sign-in to Dynamics 365. 2. Navigate to Settings 3. Locate the right entity/form type. In this example we are looking to add click2dial to the Contact form's phone fields. |
|
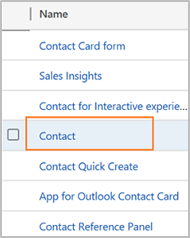
| 4. You are now viewing the different forms under the Contact entity type. Let's assume you want to add Click-to-dial to the Contact form. Select the Contact form of the Main type from the list. |
|
|
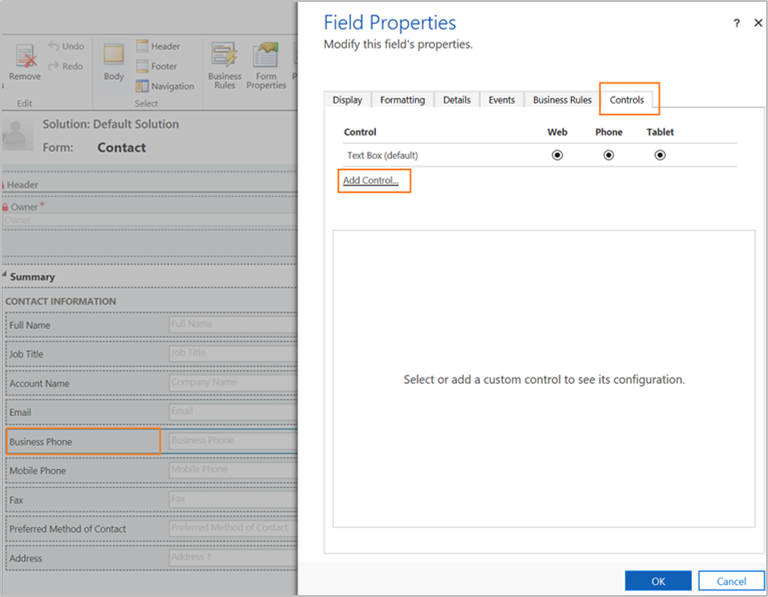
5. Select the phone field for which you want to add the control. Double-click the Business Phone or Mobile Phone. The Field Properties dialog appears. In the Field Properties dialog, choose Controls tab, and select the Add control... option. |
|
|
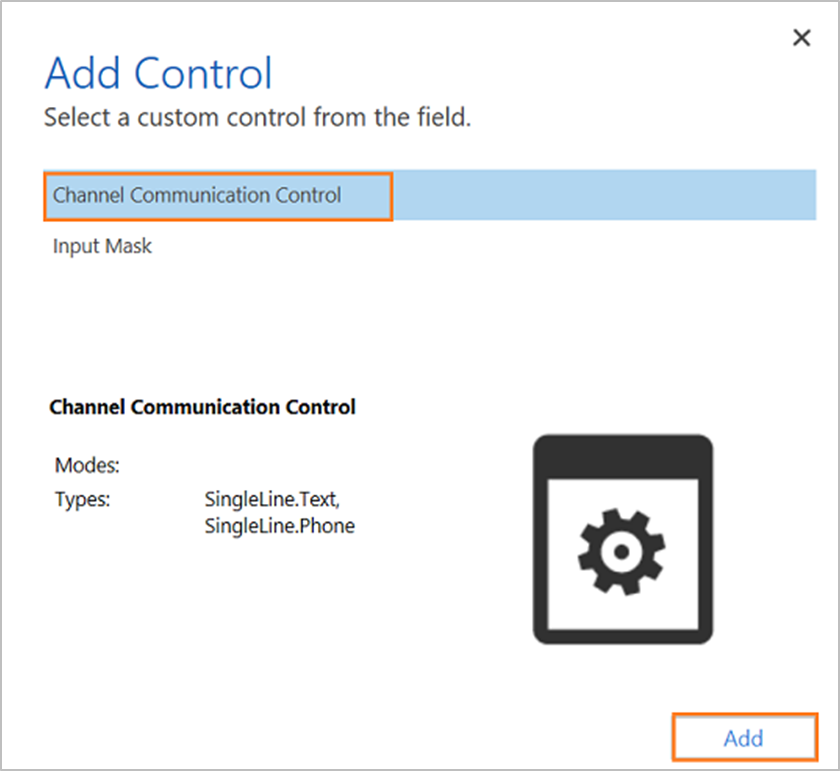
6. In the Add Control dialog, choose Channel Communication Control, and select Add. |
|
|
6. In the Field Properties dialog, select the radio button for Web. (Phone and Tablet not supported for CIF click2dial yet) |
|
|
7. Select Save, and then select Publish to publish all customizations. |
|
|
8. All done! The button to use click2dial will now appear next to the phone fields you configured. Clicking the button will launch an outbound call via Solgari Converse.
|
|


